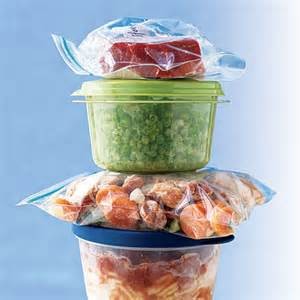
My other half calls me penny-pinching. He also calls my mum penny-pinching because she’ll put on another jumper before she’ll switch on the heating. I don’t call making use of leftover food penny-pinching and I just don’t like waste.
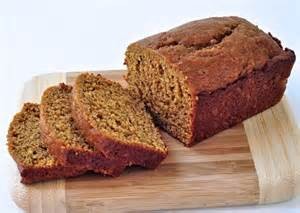
Our parents were born in a time when money was tight, their parents even more so. An unpleasant early memory of food was opening one of my Grandmas fridges as kid. The smell was appalling. Little bowls of brown unidentifiable mush were the culprits. I never knew what they were, just that I never wanted to have to eat them. So my Mum’s reluctance to switch on the heating was predictable. Thankfully she doesn’t have bowls of mush in her fridge but she is careful. I think maybe I inherited a little bit of that from her, for example I recently bought a Butternut squash to use in a Domoda recipe but on tasting it I decided not to use the squash. I didn’t want to throw it away so I scoured the recipe books to my use of my poor homeless vegetable. I came up with a couple of recipes, one for a roast squash salad and another for Butternut squash sour bread, using just one Butternut squash. The latter which I will share with you here.
This rustic bread goes particularly well with a chunky chicken and vegetable soup – another example of using leftovers to make a tasty hearty and nutritious meal.
Makes one loaf
Ingredients
350g Plain flour Plus extra for dusting
100g Wholemeal self-raising flour
125g Grated Butternut squash
30g Pumpkin seeds
1 tsp bicarbonate of soda
1/2 tsp fine salt
300 ml buttermilk
2. Mix the flours together with bicarbonate of soda and salt in a large bowl. Add the grated Butternut squash and pumpkin seeds and stir well to combine so that no lumps remain.
Make a well in the centre and pour in the buttermilk. Stir together to form a dough using your hands. If the mixture is too dry, add a little more buttermilk, likewise if it is too sticky add a little more plain flour. Turn out on to a floured surface and knead the dough for a couple of minutes or until smooth. Shape the dough into a round loaf.
3. Place the shaped loaf on a baking tray lined with baking paper. Use a sharp knife to slash a cross into the top of the loaf (this helps the bread to rise during baking)
4. Bake for 30 minutes, then reduce the oven temperature to 200c (400f/Gas 6) and bake for a further 20 minutes. When cooked the bread should be crusty and brown and sound hollow when tapped on the base.
5.Transfer to a wire rack and allow to cool for at least 20 minutes before serving. The bread can be kept, well wrapped, for up to 3 days.
More and more people are becoming committed to cut down on food wastage. Sites such as www.lovefoodhatewaste.com/ and www.sainsburysfoodrescue.co.uk are worth checking out for more information and recipe ideas.
So tell me, what do you make with your leftovers?
By Tanya Raybould


